
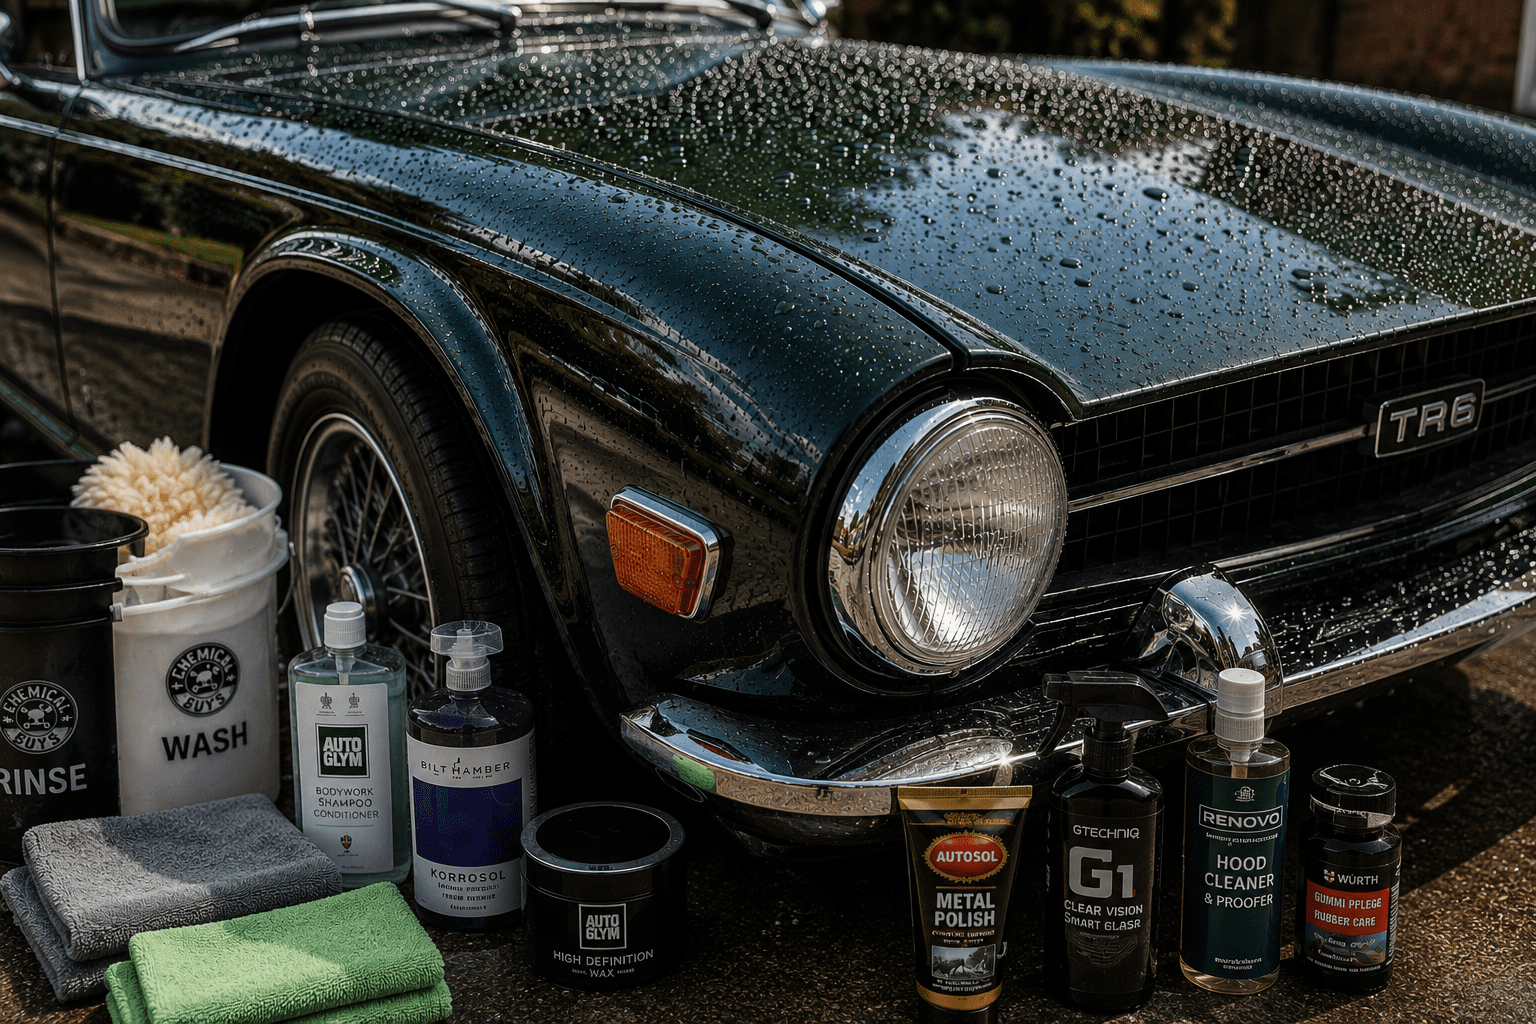
There are, broadly speaking, two types of classic car owner. The first type details their car with the systematic dedication of someone preparing for a surgical procedure: two buckets, a snow foam lance, a clay bar, separate microfibre cloths for each panel, and an opinion about carnauba wax that they are prepared to defend at length in cold weather. The second type drives the car until it becomes genuinely difficult to see out of the windscreen, then wipes the worst of it off with whatever is closest to hand and considers the job done. Both of these people own classic cars. Both of these people love their cars. Both of these people, however, are making life harder for themselves than they need to, because the first type is overcomplicating something enjoyable and the second type is quietly growing rust in places they haven’t looked yet.
This guide is for everyone between those two extremes. It covers the full process from washing to protection, works through every part of the car that benefits from attention, and is honest about what actually matters versus what is nice to have. If you have a freshly restored MGB that you want to look showroom-perfect, there is plenty here for you. If you have a Series Land Rover and consider “clean” to mean “not actively dripping,” there is useful advice here too, and it includes at least one genuine reason why cleaning your Land Rover regularly is preventing something more expensive than dirt.
Why detailing matters for classics specifically
Modern cars are treated with factory cavity wax, galvanised steel, plastic underbody panels, and coatings that resist the environment reasonably well even when neglected. Classic British cars were built without most of these things, from steel that was bare in the cavities, with rubber seals that age and crack, and with paint that was applied before the development of the chemical processes that make modern topcoats genuinely durable. This means that detailing a classic car is not purely cosmetic. It is maintenance. A correctly protected classic repels water and salt from the bodywork, keeps rubber seals pliable enough to do their job, and gives you regular close visual contact with the car so that the small problems are caught before they become the large and expensive ones.
The owner who cleans their classic regularly knows what every panel looks like. They notice the paint bubble appearing in the corner of the front wing. They see the hairline crack in the door seal before it lets water into the sill. They spot the brown stain appearing at the bottom of the windscreen aperture before it becomes structural. The owner who cleans the car twice a year misses all of this until something is visibly wrong, at which point the repair is usually considerably more involved than it would have been six months earlier.
What you actually need: the shopping list
The detailing product market is so comprehensively stocked that it is entirely possible to spend several hundred pounds before washing the car for the first time, and still not have the right product for one specific task. Resist this. The core kit that handles ninety percent of everything is modest and not expensive.
- Two buckets: one for clean shampoo water, one for rinsing the wash mitt. Cheap, simple, and the single most effective way of not grinding grit into the paint.
- pH-neutral car shampoo: Autoglym Bodywork Shampoo Conditioner, Meguiar’s Gold Class, or Chemical Guys Honeydew Snow Foam all work well. Whatever you use, it should not strip existing wax.
- Soft wash mitt: not a sponge. A sponge holds grit against the paint. A microfibre or lambswool mitt releases it into the rinse water.
- Microfibre drying towel: at least two. One to do most of the work, one for the second pass. Not the household ones from the kitchen drawer.
- Iron fallout remover: Bilt Hamber Korrosol or Autoglym Tardis. For decontaminating brake dust from paint and wheels.
- Clay bar and lubricant: for removing bonded contamination that washing doesn’t shift. Starter clay bars from Autoglym, Meguiar’s, or Chemical Guys all work.
- Metal polish: Autosol Metal Polish is the default choice for chrome and brightwork. Smells memorably unpleasant. Works memorably well.
- Paint protection: wax, sealant, or ceramic. More on this below.
- Glass cleaner and windscreen treatment: Gtechniq G1 Glass Treatment or Rain-X for the windscreen. More on this below too.
- Soft top cleaner and proofer: Renovo for fabric hoods, 303 Fabric Guard as an alternative. Specific products for vinyl hoods if applicable.
- Rubber seal conditioner: Gummi Pflege by Wurth or a silicone-free rubber dressing. Keep the seals pliable and they do their job. Let them dry out and they crack, leak, and eventually need replacing.
The wash: doing it properly without making it a project
The purpose of the wash is to remove loose contamination without scratching the paint in the process. Grit scratches paint. A sponge or dirty cloth holds grit against the paint while you scrub. The two-bucket method addresses this: bucket one contains your shampoo solution, bucket two contains clean rinse water. After each panel, rinse the mitt in bucket two before reloading from bucket one. The dirt stays in the rinse bucket and not back on the car. This takes about thirty seconds longer than washing normally and produces a meaningfully better result. It is one of those things that is slightly tedious to explain and immediately obvious once you understand what you are preventing.
Snow foam is a pre-wash stage that applies a thick foam to the car, lets it dwell for a few minutes, and rinses away most of the loose surface contamination before the mitt touches the paint. It requires a foam lance and a pressure washer. It is genuinely effective, particularly for a car that is heavily soiled. It is not essential, and a thorough rinse with a hose before contact washing achieves most of the same benefit. If you have a pressure washer it is worth adding to the routine. If you do not, a good pre-rinse and a clean mitt get you to the same destination by a slightly slower route.
Dry the car properly after washing. Water left to dry naturally leaves mineral deposits (water spots) on the paint that are difficult to remove without polish. Use the drying towel in a patting or light dragging motion rather than rubbing, and do it in the shade or indoors rather than in direct sunlight where the water evaporates before you can reach it. An old hairdryer pointed at door shuts, around the windscreen surround, and into body creases removes the last of the water from the areas a towel cannot reach. This is optional but genuinely useful in preventing water sitting in vulnerable spots and doing its quiet work over the following days.
Decontamination: the step most people skip
A freshly washed car feels clean. Run a clean fingertip lightly over the paintwork, though, and you will often feel a roughness that should not be there. That roughness is contamination bonded to the paint surface: brake dust particles from passing traffic that have embedded into the clear coat, industrial fallout, tar from road surfaces, tree sap, and whatever else the British atmosphere deposits on anything left outside. Washing does not remove these. Decontamination does.
The first stage is iron fallout removal. Products like Bilt Hamber Korrosol or Autoglym Tardis are sprayed onto the clean, wet paint and left to react for a few minutes. Ferrous particles in the paint turn the product a vivid purple as the chemical reaction identifies and dissolves them. It looks alarming. It is fine. Rinse off thoroughly and the particles come with it. Repeat on wheels, where brake dust contamination is typically worst.
The second stage is tar removal, if required. Black spots on the lower panels and sills are typically tar flicked up from road surfaces. Tar remover on a microfibre cloth dissolves them without scratching. They do not come off with shampoo, regardless of how optimistically applied.
The third stage is the clay bar. A clay bar is a pliable compound that, used with a lubricant spray, is wiped across the paint surface and physically pulls out the remaining bonded contamination. The first time you use one on a long-neglected classic, the amount of grey contamination that transfers to the clay is genuinely impressive, and not in a good way. The result, however, is paint that feels glassy smooth, and that smooth surface is what allows subsequent wax or sealant to bond properly. Clay the car after decontamination spray and before any polishing or protection. Do not drop the clay bar on the floor and then use it again. A clay bar that has picked up grit from the floor is now a grit delivery device.
Paint correction: an honest word about cutting compounds on classics
Paint correction on a classic car requires more caution than on a modern one, and this deserves to be said plainly before anyone picks up a cutting compound and a dual-action polisher. Original paint on a classic British car is typically single-stage (no separate clear coat layer), which means the colour itself is the topcoat. Every pass of a cutting compound or polishing machine removes a small amount of that layer. Original paint that has been on the car for fifty years may have significantly less thickness remaining than the paint gauges suggest, particularly on edges, shut lines, and high points where polish tends to concentrate. Burn through to the primer and you are looking at a repaint.
The practical guidance: if the car has original paintwork and you are not certain of its thickness, start with the least aggressive product that will address the marks you are trying to remove. A fine polish like Meguiar’s Ultimate Compound or Autoglym Super Resin Polish will deal with light swirls and oxidation without significant paint removal. If you are going to use a machine polisher, use a dual-action (DA) orbital polisher rather than a rotary: the DA’s random orbit prevents the heat build-up that causes burning on thin paint. Test any new product on an inconspicuous area first. The rear valance. The inside of a door. Somewhere that is not the centre of the bonnet.
For cars with a repaint over original paint, the situation is more complex because the paint thickness varies across the car depending on how the respray was done. A paint depth gauge is a useful tool: available on Amazon for around £20 to £40, it measures paint thickness in microns and tells you where you have material to work with and where you are getting close to the substrate. Not essential for a wax and polish job. Worthwhile before any significant machine polishing.
Protection: wax, sealant, or ceramic?
The wax versus sealant versus ceramic argument is the vinyl versus CD versus streaming debate of the classic car world: people have strong opinions, the practical differences are real but sometimes overstated, and the correct answer depends partly on what you actually want from the product.
Carnauba wax is the traditional choice and remains the best for achieving the deep, warm gloss that looks correct on a classic car’s paintwork. It gives a finish with warmth and depth that synthetic products replicate but do not quite match. The practical disadvantage is durability: a good carnauba wax lasts three to four months in normal UK conditions, less if the car is driven in winter. Collinite 845, Dodo Juice, Swissvax, and Poorboy’s Natty’s Blue are consistently recommended. Application by hand is perfectly adequate: a small amount on a foam applicator, left to haze, then removed with a clean microfibre. Simple. Effective. Requires more frequent reapplication than the alternatives.
Synthetic paint sealants last longer: six to twelve months on a car that is regularly maintained. They sacrifice a small amount of the visual warmth of carnauba for significantly better durability. Many modern sealants contain SiO2 (silicon dioxide) ceramic particles that add both gloss and protection. Autoglym Extra Gloss Protection, CarPro Reload, and Gtechniq EXO are all well-regarded options that apply easily and last well. For the owner who wants protection without frequent reapplication, a quality sealant is a sensible choice.
Ceramic coatings are the long-duration option: properly applied, a quality ceramic coating lasts two to five years. They create a hard, chemically bonded layer on the paint that repels water, resists contamination, and makes the car significantly easier to maintain. The catch is preparation: the paint must be in good condition, clean, decontaminated, and polished before application, because a ceramic coating locks in whatever is underneath it. Applied over oxidised paint or unresolved swirl marks, it locks those in too. Professional application is significantly more expensive than doing it yourself, but professional application also comes with the controlled environment and surface preparation that consumer DIY application often cannot match. For a freshly restored or resprayed classic, ceramic coating is genuinely worth considering. For a driver with original oxidised paint, prepare the paint first or the ceramic is a waste of money.
The honest summary: for most classic car owners, a good carnauba wax applied two or three times a year provides excellent paint protection and the best visual result. The main reason to step up to sealant or ceramic is convenience: if you dislike waxing, more durable products mean doing it less often.
Chrome: how to clean it without making it worse
Chrome on a classic British car ranges from mirror-perfect to a brown, pitted landscape that suggests the car has spent significant time near the coast in winter. Both extremes, and everything between them, can be improved with the right approach and made significantly worse with the wrong one.
Autosol Metal Polish is the product that most classic car owners use because it is the product that most classic car owners have been recommended, and it has been recommended because it works. Applied with a soft cloth, worked in gently, and buffed off, it cleans, polishes, and lightly protects chrome and other brightwork in a single product. The smell is distinctive and not particularly pleasant, but this is a small price to pay. Use it sparingly rather than enthusiastically: aggressive polishing of chrome removes the plating gradually over many applications, and chrome that has been enthusiastically polished for several decades can develop thin spots that catch light awkwardly.
Do not use abrasive cutting compound on chrome. Do not use a rotary polisher on chrome at any setting. Do not use wire wool unless the alternative is scrapping the part. Fine (0000 grade) wire wool on chrome is sometimes used to remove light surface rust from pitted plating, and it works, but it also scratches the surface finely enough to dull the reflection, and the result is chrome that looks clean but no longer looks bright. For pitted or rusted chrome that has gone beyond what Autosol can address, professional replating is the correct answer. It is not inexpensive, but it is less expensive than finding out what aggressive DIY polishing does to thin plating.
After polishing, a light coat of carnauba wax over chrome gives a degree of protection against oxidation and makes subsequent cleaning easier. This is not standard advice in most detailing guides but it works. The wax does not cloud chrome as long as it is removed before it dries fully.
Wheels: wire wheels, painted steel, and everything else
Wheels collect more contamination per square centimetre than any other part of the car. Brake dust, road grime, and tar coat them continuously during normal use, and they are the most commonly neglected area of any car that is not being prepared for a show. Clean wheels make a car look properly finished. Dirty wheels make a clean car look unfinished, regardless of what has been done to the paintwork. This is worth knowing before spending three hours polishing the bodywork and then spending thirty seconds wiping the wheels with whatever was left on the mitt.
Painted steel wheels and hubcaps are the simplest to clean: a dedicated wheel cleaner (Autoglym Custom Wheel Cleaner, Chemical Guys Diablo Gel, or similar) applied to the wheel, agitated with a wheel brush, and rinsed off. Do not use acidic wheel cleaners on painted or lacquered finishes. After cleaning, a coat of wax or sealant on painted wheels resists brake dust bonding and makes the next clean significantly quicker. A light coating of carnauba wax on painted steel around the brake drum area, where moisture sits, helps prevent the rust blistering that appears at the wheel’s inner edge on neglected classics.
Wire wheels require more effort but are not the ordeal they appear to be with the right tool. A spoke brush (specifically designed for wire wheels, available from Moss Europe and most classic car suppliers) reaches between the spokes to clean the inner surfaces. The iron fallout remover stage is particularly important on wire wheels, where brake dust accumulates in the spoke junctions. Clean wire wheels with a quality alloy or chrome wheel cleaner, use the spoke brush systematically, rinse thoroughly, and dry with a cloth forced between the spokes. Wet wire wheels that are not dried properly rust at the spoke-to-hub joints. Once cleaned, a product like Gtechniq C5 Wheel Armour or a dedicated wheel sealant applied to the spokes and rim makes subsequent cleaning significantly faster.
Glass and the windscreen treatment you probably haven’t thought about
Classic car wipers are not, in the main, excellent. The rubber dries and hardens with age, the spring pressure weakens over the decades, the motor is often not producing its original torque, and the whole assembly was designed for a windscreen that has now been scratched in various directions by sixty years of substandard rubber. The result is wipers that smear rather than clear and a driver who navigates by reasonable assumption in heavy rain. This is not ideal. There is a practical solution that costs about ten pounds and takes fifteen minutes.
A glass water repellent treatment, applied to the outside of the windscreen and other glass, causes rain to bead and roll off the glass without requiring much help from the wipers. Gtechniq G1 Glass Treatment, Rain-X, Bowden’s Own Glass Guard, and Auto Finesse Crystal are all effective options. Prepare the glass first with a glass polish (Autoglym Glass Polish or similar) to remove any oil film, road grime residue, or wiper smear marks from the surface. Then apply the treatment according to the product instructions and allow to cure. The result is a windscreen on which rainwater at any speed above approximately 30mph clears itself without wiper assistance, and below that speed the wipers move significantly less material per pass. It is genuinely transformative on a car where the wipers have always been the limiting factor in wet weather visibility.
Clean the glass on every wash. Automotive glass cleaner or diluted isopropyl alcohol on a microfibre cloth, including the inside of the glass, which accumulates an invisible oil film from the interior that produces a distracting glare in low winter sun. The inside of a classic car’s windscreen that has not been cleaned properly is more likely to be the cause of a visibility problem in a specific light angle than any external condition.
Rubber seals: the part that keeps water out
The rubber seals around doors, windows, boot lids, and bonnet edges on a classic car were generally manufactured between thirty and sixty years ago from rubber compounds that degrade with UV exposure, ozone, and age. They crack. They harden. They shrink slightly, opening gaps that water uses. A seal that is maintained with a rubber conditioner stays pliable for longer and provides a better seal for longer. A seal that is ignored dries out, cracks, and eventually fails entirely, at which point the door shut starts accumulating water and the sill begins the process that ends with a welding invoice.
Gummi Pflege by Wurth is the product most widely used for this in the classic car world, applied with a foam applicator or the supplied sponge and worked into the seal. It softens, conditions, and lightly lubricates the rubber, makes door closing quieter, and leaves a slight sheen that is barely noticeable but indicates the seal has been treated. Do not use petroleum-based products or WD40 on rubber seals: they may provide short-term lubrication while degrading the rubber itself. Silicone-free products are preferred for any rubber that is in contact with painted surfaces, since silicone contamination in paint causes fisheye and adhesion problems in any subsequent repair work.
Soft tops: mohair, vinyl, and the art of not making things worse
A soft top that is cleaned and proofed regularly stays in good condition for years. A soft top that is neglected grows mould in the seams, goes hard and brittle in the panels, and develops the patina of a car that has not been looked after. Both arrive at the same point eventually, since no soft top lasts forever, but the maintained one reaches that point at roughly twice the time.
Mohair hoods (fitted to most classic British convertibles as original or quality replacement hoods) should be cleaned with a dedicated fabric hood cleaner: Renovo Fabric Hood Cleaner is the standard choice. Apply with a soft brush, work into the fabric in circular motions, rinse thoroughly with a hose (not a pressure washer at full pressure aimed directly at the hood), and allow to dry completely before reproofing. Reproofing with Renovo Repel or Fabsil restores the water resistance that keeps rain on the outside of the hood rather than on the inside of the car. If the hood is already darkening with moisture rather than beading, reproofing is overdue. If the hood has mould on it, use Renovo Soft Top Reviver before reproofing: reproofing over mould seals the mould in and does not address it.
Vinyl hoods are simpler: clean with a diluted all-purpose cleaner, rinse, and treat with a vinyl protectant such as 303 Aerospace Protectant or Autoglym Vinyl and Rubber Care. Do not use silicone-based dressings that leave the vinyl with a shiny appearance: they attract dust, look unauthentic on classic cars, and do not provide meaningful long-term protection. The purpose of vinyl treatment on a classic hood is UV protection and flexibility, not shine.
The rear window on a soft top, whether plastic or glass, needs specific attention. Plastic rear windows become hazy with age and cannot be cleaned with glass cleaner or abrasive products without making the haziness worse. Use a dedicated plastic window cleaner (Autoglym Fast Glass works for plastic, or specialist products like Renovo Clear Plastic Window Polish for more serious hazing). A UV protectant applied to the plastic window after cleaning significantly slows the hazing process in subsequent exposure.
Interior: the bit everyone can see when you get in
A classic car’s interior reflects the era in which it was built, which on most British classics of the 1960s and 1970s means leather or vinyl seats, a wool carpet that has been there since new, a vinyl headlining, and various pieces of trim that are now somewhere between forty and sixty years old. The approach to cleaning all of these differs.
Leather seats should be cleaned with a dedicated leather cleaner (Colourlock Mild Leather Cleaner, Leatherique Prestine Clean, or Autoglym Leather Cleaner) followed by a leather conditioner (Colourlock Soft Leather Care, Connolly Hide Care, or similar). The conditioner step is not optional: leather that is cleaned but not conditioned dries faster than leather that is left alone. The purpose of conditioning is to replace the oils that cleaning and UV exposure remove, keeping the leather supple and preventing the cracking that turns a decent original interior into an expensive retrim. Do this twice a year at minimum, more frequently on cars that sit in direct sun.
Vinyl trim and seats need less maintenance than leather but are not immune to degradation. Autoglym Vinyl and Rubber Care or 303 Aerospace Protectant applied to dashboard vinyl, door cards, and seat vinyl prevents the fading and brittleness that UV exposure causes over time. Classic car dashboards that have spent decades in direct sun crack from the top surface downward in a way that is extremely difficult to repair convincingly, and most of it is preventable.
Carpets and mats benefit from a thorough vacuum and, if soiled, a diluted upholstery cleaner worked in with a stiff brush and extracted with a wet-and-dry vacuum or blotted out with clean cloths. Allow to dry completely with the doors open before closing the car: damp carpet in a closed classic car contributes to the moisture environment that corrodes floors and sills from the inside, which is one of the more unwelcome ways to discover that cleaning the carpet should have happened more regularly.
The engine bay: the area nobody has touched since 1974
The engine bay of a well-maintained classic should look clean, because a clean engine bay makes everything easier: faults are visible rather than obscured, oil leaks can be located, and the whole area is accessible without first removing the kind of deposit that forms when engine oil, road grime, and forty years of atmospheric settlement combine into a compound that is related to tarmac but with a more personal quality.
Clean a classic car engine bay with care and a degree of respect for its age. Bilt Hamber Surfex HD diluted as a degreaser is effective and safe on most materials. Apply with a brush to the heavily contaminated areas, allow to dwell briefly, then rinse with a low-pressure hose. Protect all electrical components, the carburettor(s), the air filter, and any distributor from direct water: wrap them in plastic bags or cloths before washing begins, and unwrap once the bay is rinsed and beginning to dry. The engine is considerably more tolerant of water than people imagine, but a running engine is considerably less tolerant of water than a cold one, so do this with the engine cold and leave it to dry thoroughly before starting.
Once clean, an engine bay dressing (Autoglym Engine and Machine Lacquer, or similar) applied to painted and rubber surfaces keeps the bay looking presentable and provides a baseline from which subsequent cleaning is much faster. Apply engine dressing in a fine mist rather than a heavy coat: an engine bay that looks as though it has been heavily oiled is less presentable than one that has not been cleaned at all, which is a specific failure mode worth knowing about in advance.
The underbody: where rust lives and nobody looks
The underside of a classic car accumulates road salt, mud, moisture, and the residual effects of every winter the car has experienced. It is also the area least likely to be inspected during a casual clean, which is convenient for the rust that operates there. Including the underbody in the cleaning routine, even if only as a hose-down rinse rather than a full degrease, removes the salt and moisture that cause corrosion and gives the opportunity to inspect the sills, floor, and chassis rails for the early signs of deterioration.
After cleaning, an underbody protection product extends the life of any existing coating and provides a barrier for bare metal. Dinitrol 4941 RC, Bilt Hamber Dynax S50, and Hammerite Underbody Seal are all appropriate for classic car undersides. These products are not part of a polish-and-wax routine but are worth applying annually, particularly before winter, on any classic that is driven on salted roads. The corners of sill sections, around the spring hangers, and along the inner edges of floor panels are the areas that deteriorate first and deserve specific attention.
Maintaining the finish: keeping it looking good between details
A full detail takes time. A maintenance wash that keeps a previously detailed car looking good takes twenty minutes. The difference between them is preparation: a car that has been properly decontaminated, polished, and protected is easy to clean because contamination does not bond as readily to the protected surface. Water and dirt rinse off. Salt does not stick. Between full details, a rinse and a quick wash with pH-neutral shampoo followed by a spray detailer (Autoglym Aqua Wax, Meguiar’s Hybrid Ceramic Detailer, or similar) is all that is needed to maintain the appearance. The spray detailer adds a small amount of protection with each wash and keeps the surface hydrophobic between proper wax applications.
The Land Rover owner’s guide to not making rust worse
For the owner who does not particularly enjoy detailing and has a car that was built to work rather than to be admired in a paddock, the minimum worthwhile effort is as follows. Wash the car enough to see what is happening to it. Pay particular attention to the areas where panels meet, where the floor meets the sills, where the roof joins the guttering, and where the bulkhead meets the wing. These are the places that collect water and hold it. Rinse the underbody when you wash the car, particularly after winter driving. Apply a rubber seal conditioner to door seals once a year. Apply a wax or sealant to the body once a year, because it genuinely slows surface oxidation even on a car that lives outside and works hard.
This is not detailing in any serious sense of the word. It is the maintenance level below which a classic car starts accumulating problems that cost real money to address. The thirty minutes it takes to wash a Land Rover once a month is considerably less time than the several days it takes to address the consequences of not doing so, and the price difference is not worth calculating.
For related reading: our rust prevention guide covers the specific areas where classic British cars corrode and how to treat them before they become structural problems, our paintwork restoration guide covers paint correction and repairs in more detail, our springtime safety check covers the annual inspection that should follow winter storage, and our workshop safety guide covers the precautions relevant to working with cleaning chemicals and pressure equipment in an enclosed space.
This page contains affiliate links. If you click a link and make a purchase, Classic Car Hub may earn a small commission at no extra cost to you.