The fuel system on a classic car is one of those things that works perfectly well for years, right up until the moment it doesn’t. And when it stops working, it tends to do so in ways that range from inconvenient to genuinely dangerous. A blocked jet. A perished pipe dripping petrol onto a hot engine. A tank full of rust particles that has been quietly redistributing itself around the fuel system for the past twenty thousand miles. None of these announce themselves in advance, and all of them are preventable with a modest investment of attention. This guide covers everything from routine maintenance to the significant challenge that modern fuel now presents to classic car fuel systems, because that particular problem affects every classic owner in the UK whether they know it yet or not.
The fuel tank: what lives inside it and why you should care
The standard classic car fuel tank is a pressed steel item that was welded together at the factory several decades ago, filled with petrol shortly thereafter, and has contained varying quantities of fuel and air ever since. The air is the problem. Steel and air and moisture produce rust. A tank that has been regularly used and kept reasonably full rusts slowly from the outside, where it can be spotted and treated. A tank that has spent extended periods less than half full rusts from the inside, where it cannot be seen, and the rust particles it produces circulate through the fuel system, blocking filters, scoring fuel pump diaphragms, and eventually making their way into the carburettor where they cause mischief of a detailed and expensive kind.
Sediment in the tank is not always rust. Old, degraded fuel leaves varnish deposits on the tank walls and floor that flake off over time. A car that has been standing for years with stale fuel inside it will have a tank that resembles the inside of a very neglected kettle, but brown and considerably less pleasant. Before assuming the worst, drain the tank completely and inspect through the filler neck with a torch. Light surface rust with some sediment is manageable. A tank that sounds like a percussion instrument when you shake it needs either professional attention or replacement.
Cleaning the tank
For light sediment and minor rust, the most effective method is agitation. Remove the tank, seal all openings except one, add a quantity of small nuts and bolts or a handful of clean gravel, add a litre or so of clean diesel or paraffin, seal the remaining opening, and shake vigorously for a sustained period. The abrasive action of the metal against the tank walls dislodges rust and deposits that no chemical will shift. Drain, inspect, and repeat if necessary. Then flush thoroughly with clean petrol before refitting.
For heavier rust, dilute phosphoric or citric acid solution introduced into the tank and left to work for several hours dissolves the rust chemically without damaging the steel. Citric acid is cheap, widely available, and considerably less hazardous to handle than the alternative. After treatment, neutralise thoroughly with a bicarbonate of soda solution, rinse multiple times with clean water, and dry the tank completely before refitting. Completely means completely. Any water remaining in a steel tank begins the rust cycle again immediately. Using compressed air through all openings, followed by a period of gentle warming with a heat gun, achieves this. The tank sealant products available from the likes of POR-15 provide a final layer of protection once the tank is clean and dry, though their application requires scrupulous preparation to bond correctly.
A completely rotten tank that has corroded through, or a fibreglass tank that has been attacked by ethanol-blended fuel (more on this shortly), should be replaced rather than repaired. Reproduction steel tanks are available for most popular classics at reasonable cost. Aluminium tanks, which are immune to rust and highly resistant to ethanol, are a worthwhile upgrade on any car you intend to drive regularly on modern fuel. They are not cheap, but they are a one-time solution to what would otherwise be a recurring problem.
Fuel lines, pipes and hoses
The fuel line runs from the tank to the fuel pump, and from the pump to the carburettor. On most classic British cars this route involves a combination of rigid steel pipe and short flexible rubber sections at each end, plus a flexible connection at the carburettor itself. The rigid steel sections corrode from outside and can be replaced with copper pipe, which is immune to rust, easier to bend to shape, and perfectly suitable for the relatively low fuel pressures involved in a classic car fuel system. A pipe bender and a set of compression fittings or flared end connectors are all that is required.
The flexible rubber sections are the ones that demand attention. Original rubber fuel hose degrades with age, hardening and cracking from the outside while the inner surface softens and can delaminate, sending fragments of rubber into the fuel stream. Any rubber fuel hose that shows surface cracking, stiffness, or any sign of seepage at its connections should be replaced immediately. Not eventually. Immediately. A fuel leak at a hot connection is a fire risk, and classic car fires have an unpleasant habit of being total losses before a fire extinguisher can be located.
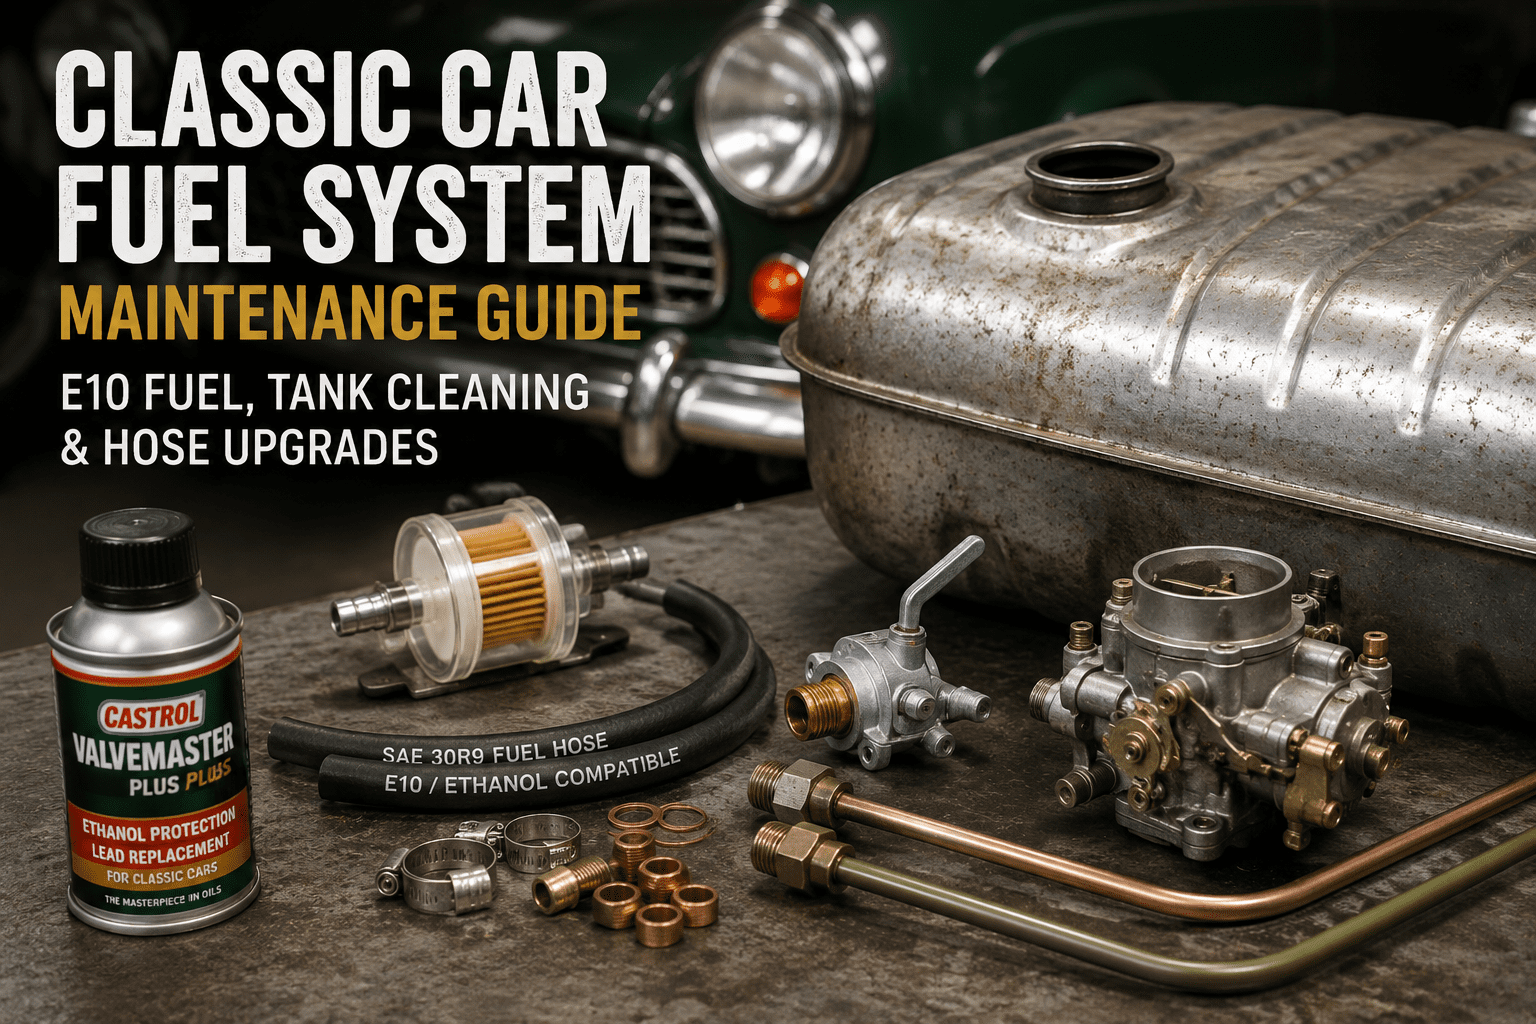
When replacing fuel hose, choose the correct specification rather than the cheapest rubber hose from the local motor factor. R9 rated hose, which meets the SAE 30R9 specification, is manufactured with an inner lining resistant to ethanol-blended fuels. The older R6 standard, which is what most cheap fuel hose is, is not ethanol compatible and will degrade faster than the original hose it replaced on a car running E10. It is not a false economy. It is an actual economy that lasts approximately three years before the problem returns. Buy R9, measure the outer diameter of the pipe stubs it will connect to, select hose with an inner diameter approximately ten percent smaller to ensure a proper grip, and cut with a sharp blade rather than scissors or wire cutters to avoid damaging the inner liner.
The fuel tap
The fuel tap, or petcock, is the valve on the tank that controls fuel flow and, on most classic cars, provides an off position for periods of storage and a reserve position for when the main supply is exhausted. The rubber seals inside the tap are among the first components to be affected by ethanol-blended fuel, and the symptoms are predictable: the tap becomes stiff to operate, starts to weep fuel around the stem, or fails to shut off completely. Rebuild kits with ethanol-compatible seals are available for most classic car fuel taps at modest cost. If the tap has become so stiff that forcing it would risk snapping the lever, do not force it. Remove the tap from the tank and rebuild it on the bench where you have room to work without risk.
Fuel filters
An in-line fuel filter fitted between the tank and the fuel pump is the simplest and most cost-effective protection for the downstream fuel system. It catches rust particles, sediment, and debris before they reach the pump or carburettor. On many classic cars no in-line filter was fitted as original equipment, and fitting one takes about twenty minutes and costs very little. Use a filter with a clear plastic bowl where possible, so that the state of the fuel can be assessed at a glance without dismantling anything.
Change the filter at every major service, and immediately if the car develops symptoms of fuel starvation: hesitation at high revs, reluctance to rev out fully, or a lean-running condition that has appeared without other explanation. A blocked filter gives symptoms almost identical to a failing fuel pump, and trying a new filter before condemning the pump is both cheaper and faster. A second filter fitted between the pump and the carburettor provides additional protection for the jet and needle, particularly useful on cars that have recently had a tank cleaned and may still be shedding fine debris.
Modern fuel and classic cars: the E10 problem
In September 2021, standard 95-octane petrol on sale at UK forecourts changed. E5, which contained up to 5% bioethanol, was replaced as the standard grade by E10, which contains up to 10% bioethanol. The change was made to reduce CO2 emissions, with the Department for Transport estimating a saving of approximately 750,000 tonnes per year. This is entirely commendable from an environmental standpoint. From the standpoint of someone trying to keep a 1970 Triumph Herald running correctly, it is rather more complicated.
The government’s own testing identified a range of problems caused by E10 in older vehicles including degradation of fuel hoses and seals, blocked fuel filters, damaged fuel pumps, corroded carburettors, and corrosion in fuel tanks. The Federation of British Historic Vehicle Clubs described E10 as the most significant threat to classic vehicles since the switch from leaded to unleaded fuel. They are not prone to hyperbole. It is a genuinely significant problem, and it affects every classic car owner who fills up at a standard forecourt pump.
What ethanol does to a classic fuel system
Ethanol causes problems in classic fuel systems through three distinct mechanisms, and understanding all three helps in deciding how to respond.
First, ethanol is hygroscopic: it absorbs water from the atmosphere. This water finds its way into the fuel tank, fuel lines, and carburettor. Water in a steel tank accelerates corrosion. Water drawn into the carburettor causes corrosion of brass, copper, tin, and zinc components. Solder, used in some older carburettor floats and in soldered fuel tank seams, is particularly vulnerable. An ethanol-damaged soldered float sinks rather than floats, flooding the carburettor with fuel and producing the kind of petrol smell that demands immediate attention.
Second, ethanol is a solvent. Its molecules are smaller than conventional petrol molecules and penetrate elastomer materials more readily. Rubber hoses, seals, and gaskets swell on contact with ethanol-blended fuel, then shrink and crack when the fuel evaporates. The result is fuel leaks. Original natural rubber fuel hose on a classic car running E10 may last a fraction of its expected service life before becoming a fire risk.
Third, ethanol has lower energy density than petrol. Running E10 in a carburettor designed and jetted for E5 or earlier fuel causes the engine to run slightly leaner, because the ethanol provides less energy per unit of fuel. The effect is modest, perhaps one to two percent worse fuel consumption, but on an engine that was already running at the lean end of tolerance it can push things in an undesirable direction. Our SU carburettor guide covers mixture adjustment, which on SU-equipped cars is a relatively simple matter of raising the jet slightly. Fixed-jet carburettors such as the Weber are more involved and may require a rejet to compensate properly.
Phase separation
There is a fourth problem specific to cars left in storage with E10 in the tank. When ethanol-blended fuel absorbs enough water, the ethanol and water separate from the petrol and settle as a distinct layer at the bottom of the tank. This layer, which is acidic and corrosive, is then the first thing to enter the fuel system when the car is started after a period of standing. It attacks metal components, damages rubber seals, and provides an excellent explanation for why a car that ran perfectly in September is making expensive noises the following April. The solution is straightforward: do not leave E10 fuel standing in the tank during winter storage. Drain the tank, or use a fuel stabiliser before laying up. Our winter storage guide covers this as part of the complete lay-up procedure.
What to do about it
The options available to classic car owners fall into three categories, ranging from comprehensive to pragmatic.
The most thorough approach is to replace all fuel system rubber components with ethanol-compatible materials before problems develop. Viton-grade seals and R9-rated fuel hose throughout, a solid carburettor float in place of any soldered original, and a fuel filter inspected and changed more frequently. Burlen Fuel Systems, who supply SU and Zenith carburettor parts, offer ethanol-compatible rebuild kits specifically developed for this purpose. This approach treats the cause rather than the symptom and is the correct long-term solution for any car driven regularly.
The more accessible middle ground is to use super unleaded (97 or 98 octane) fuel rather than standard 95-octane E10. Super unleaded remained at the E5 standard when E10 was introduced and continues to be available at most major forecourts. It costs more, typically around fifteen pence per litre at the time of writing, but it contains half the ethanol of E10 and eliminates many of the problems described above. The FBHVC has consistently recommended this as the simplest short-term solution for owners who have not yet upgraded their fuel system components.
The third option is fuel additives. Used in conjunction with either E5 super unleaded or, as a protective measure, E10 standard fuel, additives can mitigate some of the corrosive effects of ethanol on metal components. They cannot protect rubber and elastomer materials from degradation, which is an important limitation to understand before relying on them.
Fuel additives: what they do and which ones to use
The fuel additive market for classic cars divides roughly into three types: lead replacement additives, ethanol protection additives, and fuel stabilisers for storage. Each does a distinct job and they are not interchangeable.
Lead replacement additives
Classic engines built before the transition to unleaded fuel in the 1990s typically have valve seats machined directly into the cast iron cylinder head without hardened inserts. Leaded fuel provided a lubricating cushion that prevented these seats from wearing rapidly under the hammering action of the exhaust valves at high temperature. Unleaded fuel provides no such lubrication. Engines that have not been converted with hardened valve seat inserts can suffer accelerated valve seat recession when run on modern unleaded fuel, particularly under sustained high-speed conditions.
Lead replacement additives, such as Castrol Valvemaster Plus, provide a synthetic substitute for the lubricating properties of the original leaded fuel. Valvemaster Plus has received endorsement from the Federation of British Historic Vehicle Clubs and also contains an ethanol stabiliser, making it a useful combined solution for pre-1996 cars without catalytic converters. For post-1996 classics with catalytic converters, catalyst-friendly alternatives such as Millers Ethanol Protection Additive should be used instead. Lead replacement additives are not a concern for engines that have already been converted to hardened valve seats, which covers most professional engine rebuilds carried out in the past twenty years.
[ebay_placement]
Ethanol protection additives
Ethanol protection additives work by coating metal fuel system components with a corrosion-inhibiting film and neutralising the acidity that ethanol introduces to the fuel. The FBHVC notes that corrosion inhibitor additives are effective in controlling damage to metal components caused by ethanol. They cannot prevent the physical degradation of rubber and elastomer materials, which is a mechanical process driven by ethanol’s solvent properties and cannot be chemically reversed. Add the additive, by all means. But also change the rubber.
Fuel stabilisers
Fuel stabilisers are specifically formulated for storage. Modern petrol, and E10 in particular, begins to degrade within a few weeks of being dispensed. The lighter aromatic components evaporate first, leaving behind a progressively heavier mixture that forms the varnish deposits described in the tank cleaning section above. A fuel stabiliser added before winter storage significantly slows this process, reducing deposit formation and preventing the phase separation that ethanol-blended fuel is prone to during extended standing. Products such as Sta-Bil Classic are widely used and inexpensive relative to the cost of a blocked carburettor jet. Add to the fuel before the last run of the season, run the engine for a few minutes to circulate the treated fuel through the entire system, then lay the car up as normal.
The E10 compatibility checker
The UK government operates a free online tool at gov.uk that allows owners to check whether their specific vehicle is listed as compatible or incompatible with E10 fuel. Search for “E10 petrol checker” and enter the vehicle’s registration number. The result gives guidance based on the manufacturer’s own compatibility assessment for that model and year. For classic cars not listed, the incompatible result should be assumed unless the fuel system has been specifically upgraded. This applies to the vast majority of British classics built before 1996.
Routine fuel system maintenance
The practical routine for keeping a classic fuel system in good health is not complicated. At every major service: replace the in-line fuel filter, inspect all visible fuel hose for cracking or seeping, check the fuel tap operates freely and seals correctly, and look underneath the car for any sign of fuel smell or staining that suggests a slow leak somewhere in the system. Before winter storage: add a fuel stabiliser, run the engine to circulate it, and consider whether the fuel level in the tank should be left high to minimise the air space that promotes internal condensation, or drained entirely to avoid phase separation issues with E10.
A classic car that runs cleanly and starts willingly is one whose fuel system is delivering clean, correctly metered fuel to the engine reliably. It is not glamorous maintenance. Nobody photographs their fuel filter or admires a new length of R9 hose. But the alternative, a blocked carburettor in a layby, or worse, a fuel leak that becomes something more serious, makes the annual twenty minutes entirely worthwhile. Our springtime safety check guide includes the fuel system as part of the complete pre-season inspection, and our rust prevention guide covers the external corrosion that affects fuel tanks and pipes alongside the rest of the car’s structure.
This page contains affiliate links. If you click a link and make a purchase, Classic Car Hub may earn a small commission at no extra cost to you.