
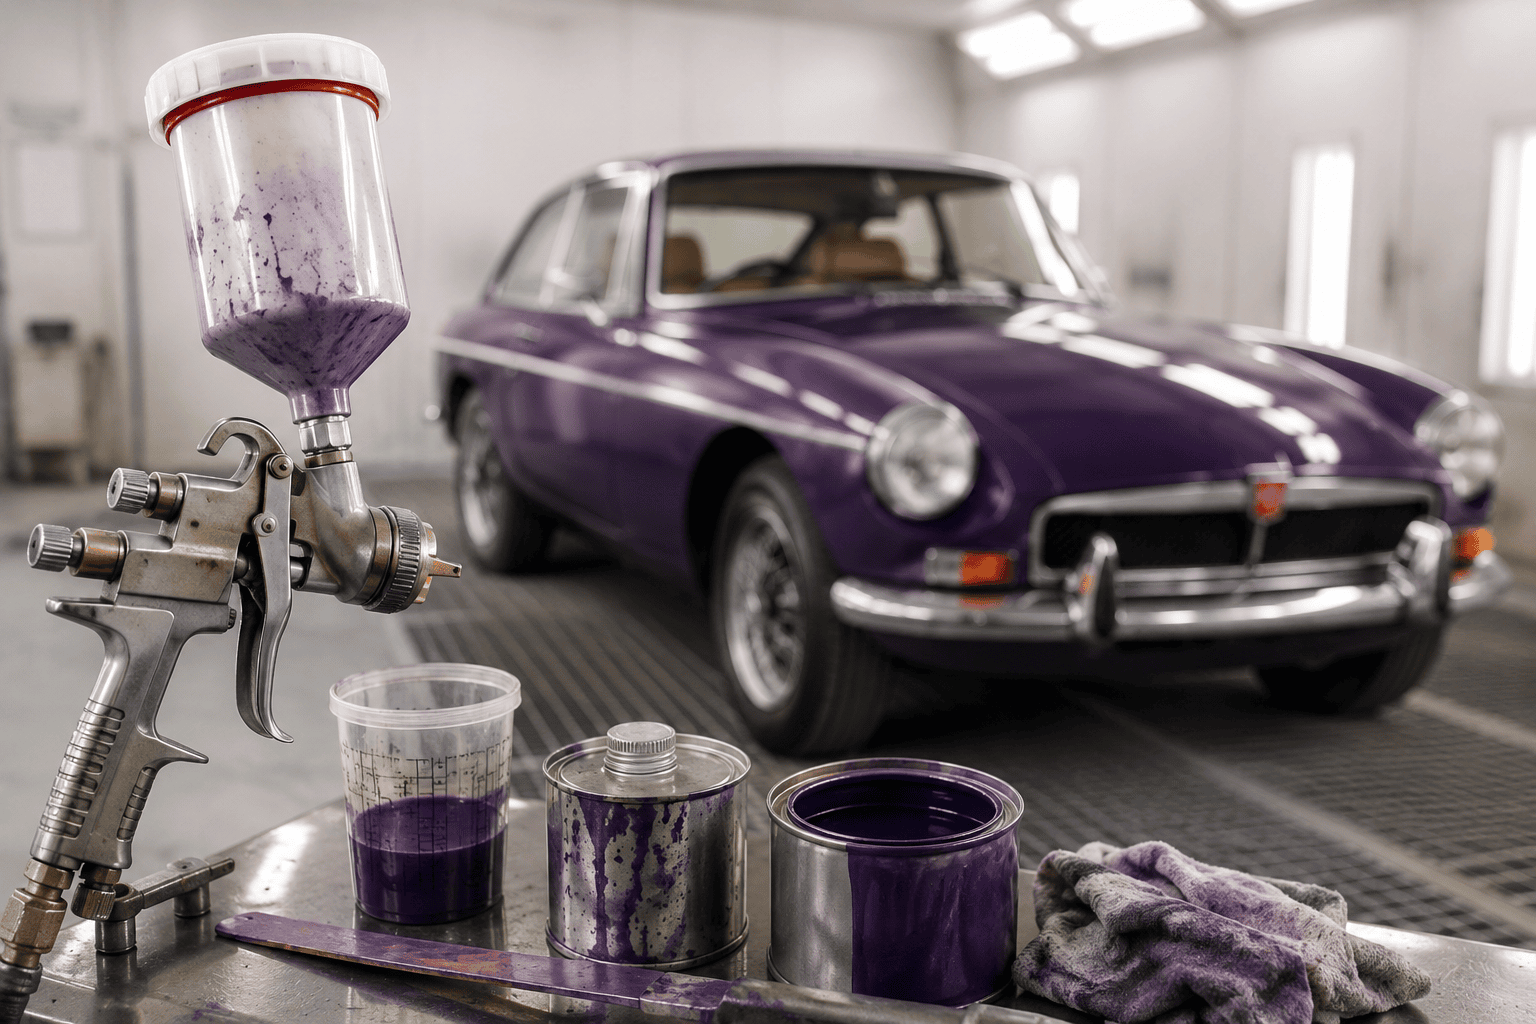
Here is a scenario that is more common than the classic car world likes to admit. An owner spends a significant sum having their 1968 MGB resprayed. The colour is correct, verified against the Heritage Certificate, matched to a spectrophotometer reading, confirmed against three different sources and a forum thread that got unexpectedly heated. The car comes back from the bodyshop and it looks… wrong. Not wrong in a way that is easy to explain to a non-enthusiast, who will say it looks beautiful and mean it. Wrong in the way that only someone who has looked at a lot of original MGBs can identify: too flat, too even, too hard, too modern. Not like a 1968 car. Like a 2010 car that happens to be painted in a 1968 colour.
The colour code was right. What was wrong was the paint system used to apply it. Your paint code tells you what colour your car left the factory wearing. It does not tell you how that colour was put on, how it dries, how it ages, what it looks like when the light catches it at forty-five degrees, or why a modern paint system applied correctly to a correct code can produce a finish that any knowledgeable judge will clock as wrong from fifteen feet. This guide is the companion piece to the paint code lookups: the how and why behind the what.
Cellulose: the system that built the industry
Nitrocellulose lacquer, universally called cellulose in the classic car world, was the dominant paint technology for production car manufacture from the 1920s through to the 1970s, and remains the correct system for any restoration seeking period originality on a pre-1980 British classic. It is made by dissolving nitrocellulose (a chemically treated plant cellulose) in a solvent carrier that evaporates as the paint dries, leaving the pigment and resin behind. The chemistry is not complicated. The results, on a correctly prepared substrate, are remarkable: a deep, light-refracting finish with a warmth and translucency that no modern one-shot system has successfully replicated, which is why concours judges can identify it by looking at the surface rather than by touching it.
The production advantages were considerable in the era before modern spray booths and forced drying. Cellulose dries by solvent evaporation rather than by chemical reaction, which means it dries relatively quickly at room temperature and can be flatted back and resprayed without any chemical compatibility concerns. A panel that goes wrong in the first coat can be sanded back and started again on the same day. More importantly for a restorer, cellulose is repairable: a fresh coat applied over the existing cellulose resolves into the existing finish as the solvent softens the surface slightly and the layers integrate. Touch-up blending is a genuine possibility rather than a theoretical one.
The disadvantages are equally well documented. Cellulose is a soft paint, susceptible to fuel, solvents, and the petrol additives that have become more aggressive since E10 arrived in standard pumps. It fades with UV exposure faster than modern paint chemistries, particularly in darker colours where the original pigment depth was partly an artefact of the solvent carrier rather than pure pigment load. It is also, being applied in many thin coats with flatting between each stage, labour-intensive: a full cellulose respray takes significantly longer than the equivalent 2K job and demands a skill set in flatting and polishing that modern bodyshops do not always maintain because they do not often need it.
The regulatory situation is worth understanding. Under the EU Directive 2004/42/EC, which the UK retained after Brexit, cellulose is exempt from the VOC restrictions that apply to general vehicle refinishing, specifically for the restoration of classic and vintage vehicles. It cannot legally be used on modern cars, and not every supplier will sell it without confirmation of the intended application. In practice, suppliers including Jawel Paints, Autopaints Brighton, and various marque specialists stock it specifically for classic car restoration, and a short conversation about what the car is and what the paint is for is usually all that is needed to establish the exemption applies. The situation is more restrictive in parts of continental Europe and in California, where cellulose’s VOC content takes it firmly into restricted territory regardless of the vehicle’s age.
Synthetic enamel: the road taken by other marques
While most British manufacturers and their paint suppliers were working in cellulose throughout the postwar period, some marques and commercial vehicle manufacturers used oil-based synthetic enamel, and it turns up on a broad enough range of vehicles to be worth understanding. Synthetic enamel is a thermosetting paint: rather than drying purely by solvent evaporation, it crosslinks chemically as it dries, which makes it significantly harder and more resistant to fuel and weather than cellulose once cured. Straight out of the spray gun it is glossier and requires less flatting and polishing to achieve a presentable finish, which made it attractive for volume applications where labour costs mattered.
The disadvantage is time and ageing: synthetic enamel dries slowly, remaining vulnerable to dust and contamination for hours rather than the minutes of cellulose, and it chalks and dulls over time in a way that makes it look less distinguished in old age than a well-maintained cellulose finish. It cannot be easily recoated once cured without mechanical abrading, and blending touch-up repairs into an existing synthetic enamel finish is considerably harder than the equivalent cellulose job. For a restorer encountering it on a vehicle, the first question is always whether to strip it entirely and start with a clean substrate or to work over it, and the honest answer is almost always to strip it.
Acrylic lacquer: the bridging system
Acrylic lacquer emerged as the dominant automotive OEM paint technology in the United States during the 1960s and filtered into European use through the 1970s, eventually replacing cellulose on British production lines as emissions pressure on solvent-based paints increased. Like cellulose, it dries by solvent evaporation and can be flatted and polished; unlike cellulose, it is harder, more UV-resistant, and less susceptible to petrol and fuel additives. Rolls-Royce continued using it on their coachwork into the late 1980s, where the combination of durability and the ability to achieve a hand-finished mirror quality on coachbuilt aluminium bodywork made it the preferred system for hand-applied concours work that production-line 2K could not match.
For restorers of cars from the mid-1970s onward that were originally painted in acrylic lacquer at the factory, this is the correct choice for an originality-class concours restoration. It is more durable than cellulose as a daily-use finish but still softer than modern 2K, still repairable by re-spraying over the existing surface where the substrate is sound, and still capable of producing the warm, deep finish that concours judges associate with the correct era. The amateur painter will find it forgiving compared to 2K: faster-drying than synthetic enamel, reworkable when something goes wrong, and available without the safety equipment that 2K demands.
2K: the modern standard, and the safety point nobody should skip
Two-pack (2K) paint, mixing a base component with an isocyanate hardener immediately before application, is what most professional bodyshops have used since the 1980s, and for good reason. Once cured, 2K produces a paint film harder than any single-stage system, resistant to fuel, chemicals, UV, and the full range of things that attack a car’s paintwork during normal road use. It holds colour and gloss almost indefinitely without the regular polishing that cellulose and acrylic need to stay presentable, and the range of colours available from any major automotive paint manufacturer in 2K is comprehensive enough to match any classic car code to a tolerably accurate result.
The concours problem is the mirror image of all these virtues: 2K looks too good for the wrong era. A 1963 car painted in 2K carries a surface quality that was not possible in 1963, and judges in originality classes will note it. A 2K finish on a pre-1980 classic reads as modern, and no amount of correct colour compensates for that in a concours context. For a car being maintained as a daily driver or a spirited show car where durability matters more than period accuracy, 2K is the logical choice. For a concours restoration, it is the wrong answer even when the colour is right.
Now for the part of the guide that is not optional reading. Isocyanate, the hardener component in 2K paint, is a respiratory sensitiser: it causes occupational asthma and can produce immediate allergic reactions on first or subsequent exposures. The critical point is that a standard dust mask or even a good quality particle respirator does not protect against isocyanate vapour. Protecting against isocyanate requires either a properly equipped spray booth with a fresh air supply, or a supplied-air (positive pressure) respirator fed from a compressor situated well away from the spray area. Isocyanates are also absorbed through skin and eyes, which means full body cover and eye protection are not optional extras in the booth. This applies whether the paint comes in a full-size mixing kit or in a 2K aerosol can. The aerosol format lowers the technical barrier to using 2K; it does not lower the hazard. Most people who have sprayed 2K paint in a domestic garage without supplied-air equipment, and there are genuinely quite a few of them, have been very fortunate rather than correct. The correct equipment for 2K is the equipment that a professional booth provides. Without it, the correct choice is a different paint system entirely.
Basecoat and clearcoat versus single-stage: the decision that trips people up
When specifying a respray, the choice between a basecoat and clearcoat system and a single-stage system is a source of genuine confusion, partly because suppliers present both options without always explaining what the practical difference means for a classic car.
A single-stage paint contains both the colour pigment and the gloss-producing resins in one product. When it cures, the surface you see is the surface of the colour coat itself. This is how cellulose, synthetic enamel, and acrylic lacquer all work, and it is also available in 2K chemistry. The gloss depth on a single-stage paint comes from the paint itself and from the flatting and polishing process.
A basecoat and clearcoat system separates these functions: the basecoat carries the colour pigment and is applied in thin, relatively flat coats without any gloss requirement. The clearcoat is applied over it and provides all the gloss, hardness, and protection. Modern new car finishes are almost universally basecoat and clearcoat, which is why they have that specific depth-with-glass quality that looks very different from an older single-stage finish. For a classic car restoration, the basecoat and clearcoat system produces a surface that looks definitively modern regardless of what colour is underneath it. It is the right choice for a modern-built replica or a car where the 21st-century finish quality is the goal. It is the wrong choice for a period-correct restoration of a car that left the factory in single-stage paint.
There is also a practical repair point worth knowing. A clearcoat system can develop clear coat failure (the clearcoat hazing, peeling, or crazing while the colour underneath remains intact) in a way that a single-stage paint cannot, because on a single-stage paint there is no clearcoat to fail separately. Clear coat failure on a modern finish is usually a repaint job. Single-stage paint that has dulled or oxidised is usually recoverable with cutting compound and polish, because the colour and the surface are the same layer.
A cautionary tale (or: why the paint system matters as much as the colour)
The MGB in the opening paragraph of this guide is not a hypothetical. A version of this story appears on MG forums with enough regularity to qualify as a recurring genre. The pattern is consistent: bodyshop applies modern 2K in the correct factory colour, car returns looking contemporary rather than period, owner is dissatisfied and cannot quite articulate why to people who have not spent time around original cars. The bodyshop, in most versions of this story, has done nothing wrong by the standards of their industry. They have applied a durable, correctly coloured, professionally finished paint system to a customer’s car. The customer wanted a 1968 MGB to look like a 1968 MGB. These are different goals, and neither party fully communicated the distinction before work began.
The conversation to have with a bodyshop before any classic car respray: what paint system do you propose to use, and is it appropriate for the car’s age and originality requirements? A good bodyshop will welcome the question. A bodyshop that has never been asked it before may need a moment to recalibrate, but will generally be capable of the answer once the question has been posed clearly.
Coach paint: the oldest system and the most honest one
Before spray guns were available, practical, or affordable for one-off coachwork, car bodies were painted by hand with a brush, using oil-based coach enamel that had been developed for horse-drawn carriage bodies in the previous century. The technique was carried forward into the early motor industry by coachbuilders who saw no reason to change a system that, applied correctly by a skilled hand, produced a finish of remarkable smoothness and depth: a mirror achieved through many coats, each flatted back before the next was applied, until the accumulated layers presented a surface that a spray gun could not necessarily better.
Coach enamel survived in professional coachbuilding well into the 1950s and 1960s on custom-bodied vehicles, where the labour cost of brush application was outweighed by the ability to achieve a perfect finish on complex panel shapes without spray equipment or spray booths. The pinstriping tradition, which is a distinct but related craft using very fine coach enamel applied with a specialist brush, remained in use as a production finishing technique on quality British cars into the 1970s and survives as a highly specialised restoration skill today.
Coach enamel has experienced a genuine revival among home restorers in recent years, for the straightforward reason that it requires no compressor, no spray gun, no spray booth, and no isocyanate safety equipment. Applied with a quality brush in thin coats and flatted between applications with progressively finer wet-and-dry, it produces a genuinely presentable finish at a cost within reach of any budget. It is not a concours finish. For the right car and the right goal, it is an entirely legitimate one, and the Land Rover Series community in particular has embraced it enthusiastically.
Coach enamel does have characteristics worth understanding before committing to it. Brush marks, colour consistency across large panels, and durability against fuel and UV are the three most common concerns raised by first-time users, and all three are genuinely relevant. However, they are also areas where the quality of the product makes a very significant difference, in a way that is more pronounced than with spray-applied systems where the gun and technique do much of the levelling work. A quality automotive-grade coach enamel, formulated specifically for vehicle use with modern self-levelling additives, flows out and levels after application in a way that a cheaper general-purpose enamel does not, substantially reducing visible brush marks on a flat panel with reasonable technique. Modern formulations also incorporate UV stabilisers and improved chemical resistance that older coach enamel recipes lacked, addressing the durability concern that the category’s historical reputation was based on. On colour consistency, a supplier who mixes coach enamel to order against specific classic car paint codes solves the cross-panel matching problem entirely: rather than hoping a tin from the shelf is close enough, the correct code is matched to a spectrophotometer reading before the paint is mixed, which is exactly what a good specialist supplier offers.
The practical conclusion: the limitations of coach enamel as a system are largely the limitations of cheap or incorrectly specified coach enamel. Using a quality automotive-grade product from a reputable supplier, mixed to the correct classic car code, addresses most of what puts people off the system, and leaves only the labour-intensity of multiple coats and the honest admission that it is a driver and show-standard finish rather than a concours one. For a significant number of classic car projects, that is exactly the right finish anyway.
The comparison table
| Paint system | Era typically used on British cars | Durability | Concours authenticity | DIY-friendly | Safety |
|---|---|---|---|---|---|
| Cellulose lacquer | 1920s–1970s (most British cars) | Low-moderate (soft, UV sensitive) | Excellent (pre-1980 cars) | Yes, with practice | Standard solvent precautions |
| Synthetic enamel | 1940s–1970s (commercial, some marques) | Moderate (chalks over time) | Good where original | Difficult (slow drying) | Standard solvent precautions |
| Acrylic lacquer | 1970s–1980s (incl. Rolls-Royce to late 80s) | Moderate-good | Good for mid-70s onward | Yes | Standard solvent precautions |
| 2K two-pack | 1980s onward (all modern bodywork) | Very high | Poor on pre-1980 cars | Not safely without a booth | Isocyanate hazard: supplied-air respirator required |
| Basecoat/clearcoat | 1990s onward (all new car production) | Very high | Wrong for any classic | Not safely without a booth | Isocyanate hazard as above |
| Coach enamel | Pre-1940s coachbuilt; revival use today | Moderate-good | Correct for pre-war; driver-standard otherwise | Excellent, brush only | Standard solvent precautions |
Choosing the right system: three goals, three answers
If the goal is concours originality on a pre-1980 British classic: cellulose is the correct paint system, full stop. It requires either a bodyshop with the expertise and inclination to work in cellulose (they exist, and marque clubs can recommend them), or a home restorer with access to a compressor, a spray gun, a workspace with adequate ventilation, and the patience to flat back between coats. The finish rewards the effort in the way no modern system can replicate, which is why it remains the judging standard for originality classes on cars that left the factory in cellulose. Factor in the legal supply chain: confirm with the supplier before ordering that the exemption applies to your car’s age and that they are comfortable supplying it for classic car restoration.
If the goal is a reliable daily driver respray that lasts: 2K is the correct choice, applied in a properly equipped spray booth by a professional. The finish will look modern, which matters less in this context than durability. Specify single-stage 2K rather than basecoat and clearcoat, which gives a slightly warmer, less clinical result that sits better on an older car even if it cannot match period accuracy. Budget for this properly: a quality 2K single-stage respray on a classic British car is not a cheap job, and the gap between the cheapest available option and a result that holds up for a decade is usually explained by preparation time rather than paint cost.
If the goal is a show-quality, period-looking finish on a car used regularly but presented at events: acrylic lacquer or a quality cellulose system, applied correctly and maintained with regular polishing, is the answer most specialists in this area give. The finish ages in the right direction: it develops the character that period paint develops rather than the clearcoat failure that modern finishes develop. It requires more maintenance than 2K. For a car that is being cared for and shown, that maintenance is part of ownership rather than a burden.
For related reading: our MG paint colour codes guide, Triumph paint colour codes guide, and Morris paint colour codes guide cover the what of factory colours; this guide has covered the how of applying them correctly. Our paintwork restoration and repair guide covers the surface preparation and touch-up work that sits between a fresh respray and a car that needs one, and our engine bay detailing guide covers the specific paint finish considerations that apply under the bonnet as well as on it.
This page contains affiliate links. If you click a link and make a purchase, Classic Car Hub may earn a small commission at no extra cost to you.