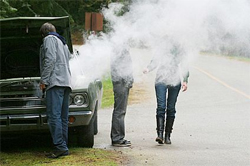
Overheating is one of the most common causes of serious engine damage on classic cars, and the cooling system is one of the most neglected areas of routine maintenance. Unlike modern cars with their sealed systems and long-life coolant, classic cooling systems need regular attention to keep them working properly. Hoses perish, radiators fur up internally, and thermostats stick. None of these problems are expensive to fix if caught early. All of them are expensive if left alone.
Back flushing your radiator
Over time the inside of a classic car radiator accumulates a build up of corrosion, scale and debris that restricts coolant flow and reduces the radiator’s ability to transfer heat. On a car of any age this is worth addressing periodically, and on a car that has been standing or has had a history of overheating it should be one of the first jobs tackled.
Most classic car radiators are constructed from copper and brass rather than the aluminium used in modern vehicles. This is actually good news for the home mechanic as copper and brass radiators are considerably more repairable and more tolerant of the back flushing process than their aluminium counterparts.
Removing the radiator
To back flush properly the radiator needs to come out of the car. On most classics this is a straightforward job, drain the coolant first, disconnect the top and bottom hoses, unplug any electric fan wiring if fitted, and unbolt the radiator from its mountings. Consult the workshop manual for your specific car as the procedure varies considerably between models. On some cars the radiator comes out upward, on others it needs the front grille or slam panel removed first. It is never quite as quick as it looks but rarely takes more than an hour on a typical British classic.
Cleaning the outside of the core
With the radiator out, start by cleaning the cooling fins on the outside of the core before you tackle the inside. Decades of road use fills the fins with insects, road debris and compacted dirt that restricts airflow as effectively as a partially blocked internal waterway. An airline is ideal for this, blowing carefully through the core to dislodge debris. A soft brush can help with more stubborn deposits. When using a brush, always work in the direction of the fins, never across them. Brushing across the fins bends them over and reduces the airflow through the core, which defeats the purpose entirely.
The back flush process
Once the outside is clean, turn the radiator upside down. This is important because you want water to flow in the opposite direction to normal coolant flow, which helps to dislodge and carry out deposits that have accumulated in the waterways. Insert a hosepipe into what is normally the bottom outlet and allow water to flow through at a steady rate. Continue until the water exiting from the top is completely clear. On a radiator that has not been flushed for some years the initial outflow can be spectacularly unpleasant, which is useful information about the state of your cooling system.
A word of caution on chemical flush products. Many of the descaling and flush additives sold for modern cars contain acids or aggressive chelating agents that are designed for aluminium systems. On a classic copper and brass radiator with soldered joints, some of these products can soften or attack the solder. Stick to plain water for the back flush and if you want to use a flush additive choose one specifically formulated for copper and brass systems, or ask a radiator specialist for advice before pouring anything in.
Repainting the radiator
Once the radiator is clean and dry it can be repainted if required. This is worth doing both for appearance and to provide some protection against external corrosion. The choice of paint matters here. Standard aerosol paints are not suitable as they will clog the cooling fins and form an insulating layer that reduces heat transfer. Use a paint specifically designed for radiators, which will be heat resistant and thin enough not to impede airflow. Black is the traditional and correct colour for most classic car radiators, and also the most effective for radiating heat.
Water hoses
Rubber degrades with age and heat, and the coolant hoses on a classic car are no exception. A hose that looks perfectly acceptable from the outside can be soft, spongy and close to failure on the inside, particularly on cars where the cooling system has run hot at any point. Split or collapsed hoses are one of the most common causes of roadside breakdowns on classic cars, and also one of the most preventable.
Squeeze each hose firmly along its length. A healthy hose feels firm and slightly resilient. A hose that feels hard and unyielding has dried out and is likely to crack under pressure. A hose that feels soft and spongy has deteriorated internally and is close to splitting. Check the ends of each hose where they meet the fittings, as this is where cracking and splitting most commonly begins. Any hose showing signs of surface cracking, swelling, or softness should be replaced rather than monitored.
On many classics, particularly those from the 1960s and 1970s, the original hose routing uses bends and curves that standard straight replacement hoses cannot replicate. Fortunately the classic car parts trade is well stocked with model-specific hoses for most common British cars. Check with your model’s specialist supplier before ordering, as a universal hose that requires tight bending to fit will restrict flow just as effectively as a partially blocked radiator.
Hose clips
While replacing hoses it is worth replacing the clips at the same time. Original factory clips on older cars are often in poor condition, and even jubilee clips that appear sound may have corroded threads that makes them difficult to tighten properly. New stainless steel jubilee clips are inexpensive and give you confidence that the fitting is secure. Tighten clips firmly but not excessively. Overtightening a jubilee clip on a rubber hose cuts into the hose material and can cause the very split you are trying to prevent.
The by-pass hose
Many classic car engines have a small by-pass hose that allows coolant to circulate through the engine block when the thermostat is closed during warm-up. This hose is frequently overlooked during routine maintenance and is often in the worst condition of any hose on the car, partly because it runs close to the engine and partly because it is easy to miss. Check it carefully and replace it along with the main hoses if there is any doubt about its condition.
Oil coolers
Engine oil on a classic car works harder than many owners realise. As well as lubricating the engine it absorbs heat from the pistons, bearings and cylinder walls, and the effectiveness of that lubrication depends significantly on the oil maintaining the right viscosity. Oil that gets too hot thins down and loses some of its ability to maintain a protective film between moving parts, which is exactly what you do not want happening on a high mileage classic engine.
Some classic cars were fitted with oil coolers as standard equipment, particularly sporting models where sustained high speed running was anticipated. If your car came with one from the factory, make sure it is in good condition and that the oil lines are free from leaks and chafing. If your car was not fitted with one originally, adding an aftermarket cooler is a sensible modification on any classic used for regular driving, long journeys or spirited use.
Fitting an oil cooler
Most classic car oil cooler kits connect via a sandwich plate that fits between the oil filter and the engine block, routing oil through the cooler matrix before it returns to the engine. The installation is straightforward on most classics and requires no drilling or permanent modification to the engine. The oil lines supplied with most kits are braided stainless steel with swaged end fittings, which are durable and resistant to the heat and vibration of a classic engine bay.
Positioning the cooler correctly is as important as fitting it in the first place. The matrix needs to be in a location where it receives a good flow of air when the car is moving. The area behind the front grille is the obvious choice on most classics and is where factory oil coolers were usually positioned. What you must avoid is mounting the cooler directly in front of the main radiator, which will restrict airflow to the water radiator and potentially make the overheating problem worse rather than better. On cars with limited space behind the grille, positioning the oil cooler offset to one side of the radiator rather than directly in front of it is usually the right compromise.
Route the oil lines carefully to avoid contact with hot exhaust components and sharp edges that could chafe through the braiding over time. Use rubber mounting grommets where the lines pass through body panels or brackets, and check the fittings for seepage after the first few running hours. A small seep that is ignored has a habit of becoming a significant leak at the most inconvenient possible moment.
Thermostats and coolant
No article on classic car cooling systems would be complete without mentioning thermostats. A thermostat that sticks open causes the engine to run too cold, which increases wear and fuel consumption and can cause running problems on carburetted engines. A thermostat that sticks closed causes the engine to overheat rapidly. On a classic car of any age, if the cooling system has not been recently attended to, replacing the thermostat is cheap insurance. They are inexpensive, straightforward to fit on most engines, and a new one gives you confidence that this particular failure mode is not lurking in the background.
Use the correct temperature thermostat for your engine. Many classic car engines run best with an 88 degree thermostat, though some earlier engines were designed for a lower opening temperature. Check the workshop manual for your specific car rather than assuming a modern 82 degree thermostat is an acceptable substitute.
Finally, use a proper antifreeze mix rather than plain water, even in summer. Modern antifreeze contains corrosion inhibitors that protect the internal surfaces of your cooling system, including the copper and brass of the radiator and the aluminium of the cylinder head if your engine has one. Change the coolant every two years regardless of condition, as the corrosion inhibitors deplete over time even if the coolant itself still looks clean. Fresh coolant is one of the cheapest and most effective forms of classic car cooling system maintenance available.
This page contains affiliate links. If you click a link and make a purchase, Classic Car Hub may earn a small commission at no extra cost to you.